
Hostwinds Blog
Search results for:
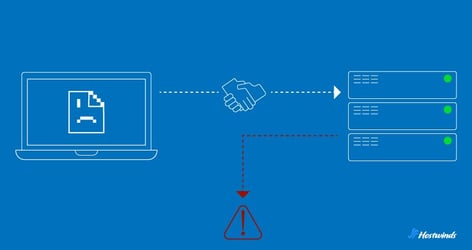
DNS Server Not Responding: 8 Fixes for PC/Mac
by: Hostwinds Team / February 22, 2024
What is DNS Not Responding?
DNS, or Domain Name System, is like the internet's phonebook. It translates human-friendly domain names, like www.hostwinds.com, into computer-friendly IP addresses, like 192.168.1.1.
When you encounter a "DNS not responding" error, it means your browser is having trouble reaching the DNS server to perform this translation.
Signs of Possible DNS Response Issues
When DNS isn't responding, browsing the web can become difficult if not impossible. But how can you tell if you're experiencing DNS response issues or just have a bad connection?
Here are few signs that could indicate an issue with your DNS:
Web Pages Not Loading: One of the most noticeable signs of DNS not responding is the inability to load web pages. When you type a website's URL into your browser's address bar and hit Enter, your browser relies on DNS to find the corresponding IP address. Without a working DNS, your browser can't resolve the domain name, leaving you staring at a blank page or loading a never ending spinner.
Error Messages: You might encounter error messages such as "DNS Server Not Responding" or "DNS Probe Finished No Internet." These messages are your device's way of telling you that it can't establish a connection with the DNS server to retrieve the necessary information.
Slow Internet Browsing: Even if web pages eventually load, you may notice that your internet speed becomes sluggish. This is because your device is struggling to resolve domain names, causing delays in fetching web content. Streaming videos might buffer endlessly, online games may lag, and downloads could take ages.
Spotty Connection: DNS issues can be intermittent. You might find that some websites load while others don't, or your connectivity fluctuates throughout the day.
How to Fix DNS Server Not Responding Errors
When DNS-related issues disrupt your internet connectivity, it's good to know how to troubleshoot and resolve them effectively. There are eight 8 effective ways to go about it:
Switch Web Browsers
Restart Router
Restart Computer in Safe Mode
Flush DNS Cache
Reconfigure DNS Server
Reconfigure Firewall or Security Software
Disable IPV6
Contact ISP
Switch Web Browsers
Sometimes the simplest solution is the right one. Switch or update your browser.
If you find that switching your browser works, be sure to make it your default browser.
Restart Router
Your router may be holding on to too much data causing a bottleneck when trying to access the web.
Turn off and unplug your router. Wait for about 30 seconds before plugging it back in and turning it on. Let it boot up and try accessing the same website you had the initial connection issues with.
Restart Computer in Safe Mode
If an operating system isn't working properly, it could lead to DNS response issues.
Restarting your computer in Safe Mode will limit the amount of files and resources being used, some of which may be causing the DNS not responding problem.
Fix for Windows:
- Click on the Windows icon at the bottom left of your screen
- Click on "Power"
- This will open up the options for "Sleep," "Shut down," and "Restart"
- While holding down the Shift key, click on "Restart"
- You'll be taken to the "Choose an option" screen
- Click on "Troubleshoot"
- Click on "Advanced"
- Click on "Start-Up Settings"
- Clinic on "Restart"
- Once your PC restarts you'll see a list of options
- Select 5 or press F5 for Safe Mode with Networking
Fix for macOS:
- Click on the Apple icon at the top left of your screen
- Click on "Shut Down"
- Wait for your Mac to completely shutdown
- Press and hold the power button until "Loading startup options" appears
- Select a volume
- While holding down the Shift key, click "Continue in Safe Mode"
- Your Mac will restart automatically. You'll know your in safe mode when you see "Safe Boot" in the menu bar of the login window
Flush DNS Cache
Cached DNS data on your device or router can become outdated or corrupted over time, leading to DNS not responding errors.
Fix for Windows:
- Open Command Prompt as an administrator.
- Click on Windows start button or open search at bottom left
- Type in "Command Prompt"
- Right click on the command prompt and click "Run as administrator"
- Type "ipconfig /flushdns" (no quotes) and press Enter.
Fix for macOS:
- Open Terminal.
- Click the "Launchpad" icon in the Dock
- Type "Terminal" in the search box, then click on "Terminal"
- Type "sudo dscacheutil -flushcache" and press Enter.
Reconfigure DNS Server
Misconfigured DNS server settings can disrupt DNS resolution. This can happen if you've manually set DNS server addresses that are incorrect or no longer functioning.
It's a good idea to set your system to automatically detect and connect to an available DNS server. Here's how to do that:
Fix for Windows:
- Open the control panel
- Depending on which version of Windows you're running, there are several ways to access the control panel. A universal method is by pressing Windows key + R, which opens the "Run" window.
- Type "control" in the dialogue box and hit Enter or click "OK".
- This will take you to the control panel window
- View network status and tasks
- Locate "Network and Internet" in the control panel window.
- Click "View network status and tasks", located below "Network and Internet".
- This will take you to the "Network and Sharing Center" window.
- Change Adapter Settings
- Click "Change adapter settings", located on the left-hand side of the "Network and Sharing Center" window.
- This will take you to the "Network Connections" window
- Open Network Connections Properties
- In the "Network Connections" window you'll see the different connection options (ex. Ethernet or Wi-Fi).
- Right-click on the option that you have connected to the internet. A small window will pop up.
- Click on "Properties".
- This will take you to the properties window of your network connection (ex. Ethernet Properties).
- Access IPV 4 Properties
- Select it by clicking on it once to highlight it.
- Click the "Properties" button located beneath the list of components.
- In the "Internet Protocol Version 4 (TCP/IPv4) Properties" window, you'll see options for obtaining DNS server addresses automatically or using specific DNS server addresses.
- If you want to manually configure DNS server addresses, select the option that says "Use the following DNS server addresses".
- Enter the preferred and alternate DNS server addresses provided by your DNS provider or network administrator into the respective fields.
- Click "OK" to save the changes and close the properties window.
Fix for macOS:
- Go to "System Preferences" > "Network."
- Click the Apple icon in the top-left corner of your screen, select "System Preferences," and then choose "Network."
- Select your connection (Ethernet or Wi-Fi) and click "Advanced."
- In the Network window, choose your active network connection (e.g., Ethernet or Wi-Fi), and click the "Advanced" button.
- In the "DNS" tab, remove any custom DNS server addresses and leave it blank.
- In the Advanced window, go to the "DNS" tab.
- If you see any custom DNS server addresses listed in the left pane, select them and click the minus (-) button to remove them.
- Leave the DNS server list blank.
Configure Firewall or Security Software
Firewall or security software can block DNS queries, preventing your device from communicating with DNS servers.
Fix for Windows:
- Open Windows Defender Firewall
- Type "Firewall" in the Windows search bar and select "Windows Defender Firewall."
- Click "Allow an app or feature through Windows Defender Firewall" on the left.
- Scroll down to find "DNS Client" and ensure it's checked for both private and public networks.
Fix for macOS:
- Go to "System Preferences" > "Security & Privacy."
- In the "Firewall" tab, click "Firewall Options."
- Ensure "DNS" is allowed in the list of services.
Disable IPV6
The transition from IPv4 to IPv6 can sometimes cause compatibility issues with DNS. This can result in DNS not responding errors, particularly on older systems.
Fix for Windows:
- Open Network and Sharing Center:
- Click on the Windows icon in the taskbar or press the Windows key.
- Type "Control Panel" and press Enter.
- In the Control Panel, click on "Network and Sharing Center."
- Change Adapter Settings:
- On the left-hand side, click on "Change adapter settings."
- Identify Your Network Connection:
- Right-click on the network connection you are using (e.g., Ethernet or Wi-Fi) and select "Properties."
- Adjust Network Properties:
- In the network properties window, scroll down and find "Internet Protocol Version 6 (TCP/IPv6)."
- Uncheck the box next to "Internet Protocol Version 6 (TCP/IPv6)" to disable IPv6 for this connection.
- Click "OK" to save your changes.
- Reboot Your Computer:
- To ensure the changes take effect, it's a good practice to restart your computer.
Fix for MacOS:
- Open System Preferences:
- Click on the Apple logo in the top-left corner of your screen.
- Select "System Preferences."
- Network Preferences:
- In the System Preferences window, click on "Network."
- Select Your Network Connection:
- In the left sidebar, select the network connection you are using (e.g., Wi-Fi or Ethernet).
- Advanced Options:
- Click the "Advanced" button in the bottom-right corner of the window.
- TCP/IP Tab:
- In the advanced settings, go to the "TCP/IP" tab.
- Configure IPv6:
- In the "Configure IPv6" dropdown menu, select "Link-Local only." This effectively disables IPv6 for this connection.
- Save Changes:
- Click "OK" to save the changes.
- Apply and Restart:
- Click "Apply" in the Network settings window.
- To ensure the changes take effect, it's recommended to restart your computer.
Contact Your Internet Service Provider (ISP)
When your Internet Service Provider (ISP) experiences DNS issues, you might encounter DNS not responding errors. This is beyond your control and should be reported to your ISP.
While waiting for a resolution, consider temporarily switching to alternative DNS servers like Google DNS (8.8.8.8 and 8.8.4.4) or OpenDNS (208.67.222.222 and 208.67.220.220).
Don't Let DNS Get You Down
While frustrating, a "DNS Server not Responding" error is not the end of the world. And now that you know how to identify and fix the issue, you can get back to surfing the web without any further interruptions.
Written by Hostwinds Team / February 22, 2024