
Hostwinds Blog
Search results for:
How to Mount, Burn, and Extract ISO Files
by: Hostwinds Team / December 15, 2023
What is an ISO File?
An ISO file, also known as ISO image and short for ISO9660, is a disc image format that contains the entire file structure of an optical disc, such as a CD or DVD. This includes the file system, boot sector, and all files and folders present on the original disc. Essentially, an ISO file is a digital snapshot of the contents of a physical disc.
The ISO9660 standard is an industry standard media format that defines the organization and structure of data on optical discs. This standardization ensures compatibility across various operating systems, making ISO files universally readable.
Why Use ISO Files?
ISO files are a valuable tool for handling large sets of data, but there's more to this robust format than just storage.
Here are just a few reasons why ISO files are becoming more and more prevalent.
Portability: ISO files of convenient way to store and share large amounts of data. Whether you're distributing software, sharing multimedia content, or archiving important files, an ISO file allows you to carry the entire contents of a disc without the need for a physical medium.
Universal Compatibility: By adhering to the ISO9660 standard, ISO files ensure universal compatibility across various operating systems. Whether you're using Windows, Mac, Linux, or other platforms, the standardized file system guarantees seamless access and readability.
Efficient Software Distribution: ISO files are commonly used for distributing software. Packaging applications into an ISO format streamlines the distribution process. Users can then easily install software directly from the ISO file, eliminating the need for physical discs or complex installation procedures.
Operating System Deployment: Creating bootable USB drives or DVDs from ISO files is a common practice for installing or deploying operating systems. This method simplifies the installation process, particularly for system administrators or individuals setting up multiple devices.
Data Preservation: ISO files play a crucial role in preserving the content and structure of old or rare optical discs. By creating ISO images, users can effectively archive and safeguard the data from these discs, ensuring its longevity and accessibility in a digital format.
Versatility in Backup Strategies: Utilizing ISO files for backup purposes provides a versatile solution. Whether you're backing up software installations, personal files, or entire operating systems, the compact and organized nature of ISO files makes them an efficient choice for data backup.
Reduced Physical Media Dependency: With ISO files, there's a reduced dependency on physical media like CDs or DVDs. This not only contributes to environmental sustainability but also simplifies data management by eliminating the need for physical storage and handling of discs.
Streamlined Virtualization: ISO files are frequently used in virtualization environments. Virtual machines can mount ISO images directly, allowing for the seamless installation of software or operating systems without the need for physical media.
Space Efficiency through Compression: ISO files can be compressed, reducing their size for more efficient storage and distribution. This compression doesn't compromise the integrity of the data, making it a practical solution for managing large volumes of information.
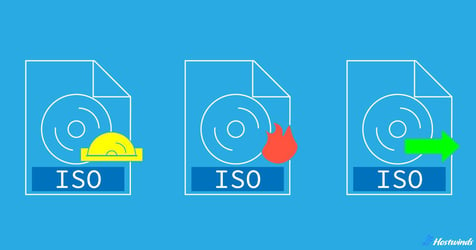
Accessing ISO File Content
There are 3 core methods for accessing an ISO image: Mounting, burning and extracting. Let's explore how these work and show you how to utilize them across the most common operating systems - Windows, MacOS, and Linux.
Mounting an ISO File
"Mounting" refers to the process of making the contents of an ISO file accessible by creating a virtual drive. This is essentially simulating the presence of a physical disc drive, complete with its own drive letter (e.g., D: or E:).
Think of it as a hands-free version of inserting a physical CD into the computer.
How to Mount ISO File on Windows
Step 1: Locate the ISO File
Download the ISO image or locate it in File Explorer (shortcut: Windows + E).
Step 2: Mount the ISO File
Right-click on the ISO file.
In the pop-up menu, select "Mount," which will open a virtual drive in FIle Explorer, allowing you access to the media.
This option is available in Windows 11, 10, and 8.1. If you are using an older version of Windows or if the "Mount" option is not available, you can use third-party software like WinCDEmu or Daemon Tools to achieve the same result. Install the software, then right-click on the ISO file, and select the "Mount" option from the context menu.
How to Mount ISO File on MacOS
Step 1: Open Disk Utility
Disk Utility can be found in the "Utilities" folder within the "Applications" folder. You can also use Spotlight Search (Command + Space) to quickly find and open Disk Utility.
Step 2: Click on "File" in Disk Utility:
In Disk Utility, click on "File" in the top menu.
Step 3: Select "Open Disk Image..."
Choose "Open Disk Image..." from the drop-down menu.
Step 4: Navigate to the ISO File
Locate and select the ISO file you want to mount, then click "Open."
Step 5: Mount the ISO File
Disk Utility will mount the ISO file, and you will see the virtual disk icon on your desktop and in the Finder sidebar.
Once the ISO file is mounted, you can access its contents like any other drive on your Mac..
How to Mount ISO File on Linux
Step 1: Open Terminal
Open a terminal window. You can usually find the terminal in your application menu or by using a keyboard shortcut like Ctrl + Alt + T on many Linux distributions.
Step 2: Create a Mount Point
Choose or create a directory (folder) where you want to mount the ISO file. For example, you can create a directory named "iso_mount" in your home folder:
mkdir ~/iso_mountStep 3: Mount the ISO File
Use the 'mount' command to mount the ISO file. Replace /path/to/your/file.iso with the actual path to your ISO file, and replace /path/to/your/mount_point with the path to the directory you created:
sudo mount -o loop /path/to/your/file.iso /path/to/your/mount_pointThe '-o loop' option is used to mount the ISO file as a loop device.
Step 4: Access the Mounted ISO
Once mounted, you can access the contents of the ISO file in the specified mount point directory.
Step 5: Unmount the ISO File:
When you're done, it's important to unmount the ISO file to ensure a clean disconnection. Use the 'umount' command:
sudo umount /paht/to/your/mount_pointIf the 'umount' command doesn't work, you might need to use 'umount -l' to force the unmount:
sudo umount -1 /paht/to/your/mount_pointRemember to replace the placeholder paths with the actual paths relevant to your system. The 'sudo' command is used to execute these commands with administrative privileges, as mounting typically requires elevated permissions.
Burning ISO Files
Burning an ISO file involves the process of copying its contents to a physical storage medium (e.g., CD or DVD), creating a tangible copy that can be used for a variety of purposes, such as software distribution, creating bootable media, or archiving data.
How to Burn ISO File on Windows
After locating your ISO file and inserting a blank disc into your computer, perform the following steps:
Step 1: Access Disc Image Burner Utility
Right-click on the ISO file. In the pop-up menu, select "Burn disc image."
The Windows Disc Image Burner utility will open. If you have multiple optical drives, make sure to select the correct one from the "Disc burner" dropdown menu.
Step 2: Click "Burn"
Click the "Burn" button to start the burning process.
Step 3: Wait for Completion
The Windows Disc Image Burner will show a progress indicator, and you'll receive a notification when the process is complete.
Once the burning is finished, you can eject the newly created disc from your computer.
How to Burn ISO File on MacOS
After inserting a writable disc into your computer, perform the following steps:
Step 1: Open Disk Utility
You can find Disk Utility by going to "Applications" > "Utilities" or by using Spotlight Search (Command + Space) to find and open it.
Step 2: Select ISO File
In Disk Utility, click on "File" in the top menu and select "Open Disk Image..." Navigate to and select the ISO file you want to burn.
Step 3: Verify Settings
Once the ISO file is selected, you will see it listed in Disk Utility.
Verify that the ISO file is selected and check the settings, such as the burner and burn speed.
Step 4: Click "Burn"
Click the "Burn" button in the toolbar.
If prompted, you may be asked to configure additional burn options. Adjust these settings based on your preferences.
Step 5: Wait for Completion
Disk Utility will begin the burning process. You will see a progress indicator, and once the process is complete, you'll receive a notification.
Once the burning is finished, eject the newly created disc from your Mac's optical drive.
How to Burn ISO File on Linux
Burning an ISO file on Linux can be done pretty effortlessly with a tool like Brasero or performed manually using the 'dd' command. Here's how you can do it using the 'dd' command.
Step 1: Open Terminal
After inserting a blank disk and locating the ISO file, open a terminal window. You can usually find the terminal in your application menu or by using a keyboard shortcut like Ctrl + Alt + T on many Linux distributions.
Step 2: Identify the Target Device
Use the following command to list your available storage devices and identify the target device (your writable disk). Be very careful with this step to avoid overwriting the wrong device.
lsblkStep 3: Unmount the Target Device
If the target device is mounted, unmount it using the following command. Replace '/dev/sr0' with your actual device identifier.
sudo umount /dev/sr0Step 4: Burn the ISO File
Use the 'dd' command to copy the ISO file to the target device. Replace '/path/to/your/file.iso' with the actual path to your ISO file and '/dev/sr0' with your target device.
The 'bs=4M' option sets the block size for data transfer, and 'status=progress' shows the progress of the operation.
sudo dd if=/path/to/your/file.iso of=/dev/sr0 bs=4M status=progressOnce the file is done burning, you can eject the disc from your computer
If you need to access the contents without mounting or burning, you can extract them.
Extracting ISO Files
Extracting refers to the process of downloading ISO file contents directly to your computer. Unlike mounting, which requires the creation of a virtual drive, extracting allows you to store and access specific files without having to deal with the entire disk's structure.
How to Extract ISO Files on Windows
In order to extract content from an ISO image, you'll first need to mount the ISO using the steps in the "How to Mount ISO Files on Windows" section above. Once mounted, proceed with the following steps:
Step 1: Open the virtual disk
Double click on the virtual disk to access the files.
Step 2: Copy and Paste
Select the files you want to extract and simply perform a copy/paste to any location on your computer.
Step 3: Eject Disk
After extracting the files, right-click on the virtual disk and select "Eject" to unmount the ISO file.
The files you copied to your computer will still be accessible.
How to Extract ISO Files on MacOS
Step 1: Open Disk Utility
You can find Disk Utility by going to "Applications" > "Utilities" or by using Spotlight Search (Command + Space) to find and open it.
Step 2: Select ISO File
In Disk Utility, click on "File" in the top menu and select "Open Disk Image..." Navigate to and select the ISO file you want to extract.
Step 3: Verify Settings
Once the ISO file is selected, you will see it listed in Disk Utility. Verify that the ISO file is selected and check the settings.
Step 4: Choose Extract Destination
Still in Disk Utility, select the ISO file on the left-hand side.
Click on the "File" menu and choose "New Image," then "Image from 'your ISO file name.'"
Step 5: Select Destination and Save
Choose the destination where you want to save the extracted files.
Click the "Save" button. Disk Utility will begin the extraction process.
Once the extraction is complete, you can navigate to the destination folder and access the extracted files and folders.
How to Extract ISO Files on Linux
For extracting ISO content through Linux command prompt, we would recommend using a 3rd party archival software like 7-Zip. Here's how to do that:
Step 1: Install 7-Zip
If you don't have 7-Zip installed, you can do so through your package manager. For example, on Ubuntu:
sudo apt-get update
sudo apt-get install p7zip-full
Step 2: Extract ISO File
Use the following command to extract the ISO file. Replace '/path/to/your/file.iso' with the actual path to your ISO file and '/path/to/your/extract_folder' with the destination folder:
7z x /path/to/your/file.iso -o/path/to/your/extact/folderWhether you're installing software, deploying an operating system, or preserving memories from old discs, ISO files are an invaluable asset for most any digital application. Now that you know how they work and how to use them across several operating systems, go forth and use this knowledge to create a better more organized digitial landscape.
Written by Hostwinds Team / December 15, 2023